Complete your DIY projects with a perfect finish! A smooth and professional finish is the key to a flawless result, whether you're filling a hole in the wall or levelling a wooden surface. But how do you achieve that smooth finish? Choosing the right levelling tools plays a crucial role. In this article, we'll show you the best levelling tools to achieve a smooth and professional finish.
With these tools, you can remove unevenness, smooth surfaces and achieve the desired result. We present tools for different surface materials and projects, from small repairs to larger renovation jobs. Whether you're an experienced DIYer or a beginner, in this article you'll find everything you need to know to achieve the perfect finish. Start today to take your DIY projects to the next level and achieve impressive results.
Why levelling is important
Levelling is a crucial step in many renovation and DIY projects. Not only does it help to smooth surfaces, but it also helps to fix minor imperfections that may arise during the construction or renovation process. Whether it's cracks in walls, holes in the ceiling or imperfections on wooden surfaces, levelling ensures that the substrate is prepared for the final coating. A smooth finish not only makes a professional impression, but also extends the life of the surface being treated.
Another important aspect of levelling is aesthetics. Unevenness and imperfections in the surface can affect the overall appearance of a room. If you make the effort to rectify these problems with the right levelling tools and technique, you can increase the value of your home and make it more enjoyable. This is particularly important if you are planning to sell or let your property. A flawless finish will attract potential buyers or tenants.
In addition, levelling ensures better adhesion of paint and other coatings. If the surface is uneven or damaged, the paint cannot adhere properly, which can lead to peeling or an uneven surface. By levelling, you create an ideal base that increases the longevity of the materials applied to it. Therefore, levelling is not only a cosmetic improvement, but also an important measure to ensure the quality and durability of your DIY projects.
Different types of levelling compounds
There are different types of putties that are suitable for different applications and materials. One of the most common putties is plaster or filler, which is ideal for walls and ceilings. It enables cracks and holes to be filled quickly and easily and provides a smooth surface that is ideal for painting or wallpapering. This type of filler is usually easy to work with and dries quickly, making it ideal for minor repairs.
Another popular option is acrylic levelling compound, which is particularly suitable for exterior applications. It is weatherproof and can be used on a variety of materials, including wood and metal. Acrylic putty is flexible and can retain its shape even with temperature fluctuations, making it an excellent choice for window and door frames. This type of filler is also available in a range of colours, reducing the need for additional painting.
For intensive applications, such as filling larger holes or levelling very uneven surfaces, a special building compound is often used. This filler has a stronger consistency and is able to repair larger defects. It is ideal for concrete and masonry and offers an extremely robust solution. When choosing the right levelling compound, it is important to consider the specific requirements of your project in order to achieve the best results.
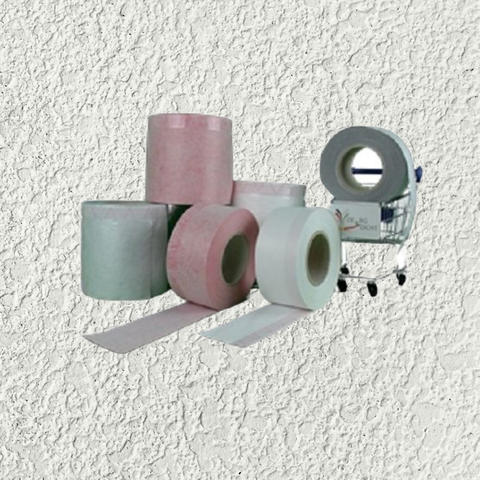
Tools for levelling: An overview
Choosing the right tools for levelling is crucial for a successful result. One of the basic tools is the putty knife, which is available in various sizes and shapes. A wide trowel is good for large areas, while a small trowel is ideal for precise work and filling smaller cracks. It is important to choose the right size to ensure an even application of the filler.
In addition to putty knives, specialised tools such as a putty knife or trowel can also be useful, especially for larger projects. A levelling machine enables the levelling compound to be spread evenly and saves time and effort. These tools are particularly useful if you are working on a large area or need to apply a thicker layer of levelling compound.
Sanding tools are another important aspect. Once the levelling compound has dried, it is necessary to smooth the surface to achieve a perfect finish. Sanding sheets or sanding machines are ideal for this. These tools help to remove imperfections and create a smooth, even surface that is ready for the next coat. Make sure you choose the right abrasives for your project to achieve the best results.
The best levelling compound brands on the market
Choosing the right putty brand can have a significant impact on the outcome of your project. Some of the most recognised and highly regarded brands are Knauf, Pufas and Rigips. These companies offer a wide range of products that are suitable for different applications. Knauf is particularly well known for its high-quality plaster and filling compounds, which are characterised by their ease of application and excellent adhesion.
Pufas is another established brand known for its innovative solutions in the field of levelling compounds. Its products are specially developed for professional users and offer excellent quality and performance. Particularly noteworthy are the Pufas universal compounds, which are versatile and suitable for both interior and exterior applications.
Rigips is also a well-known brand that specialises in products for drywall construction and interior finishing. Their levelling compounds are particularly suitable for use in damp environments and offer high resistance. If you are looking for high-quality levelling compounds, you should consider these brands to ensure you get the best results.
Step-by-step instructions for levelling
It is important to follow the correct procedure in order to carry out levelling successfully. Firstly, you should thoroughly clean the surface you want to fill. Remove dust, dirt and loose materials to ensure that the levelling compound adheres well. Use a broom or a hoover to create a clean work surface.
Once the surface has been prepared, you should mix the levelling compound. Follow the manufacturer's instructions to achieve the right consistency. As a rule, you will need to mix the levelling compound with water until it has a creamy but firm consistency. Use a mixer or spatula to ensure that there are no lumps.
Now you can apply the levelling compound. Start at one corner and apply the compound with the spatula in an even motion. Make sure that you press the compound well into the cracks and holes to ensure even coverage. Allow the filler to dry according to the manufacturer's instructions before you start sanding. Once the compound is completely dry, use sandpaper or a sander to smooth the surface and achieve a perfect finish.
Tips and tricks for a smooth and professional finish
To achieve a professional finish, there are a few tips and tricks you should follow. Firstly, it is important to apply the levelling compound evenly and to the correct thickness. Avoid applying too much compound at once, as this can lead to cracks and unevenness. Work in thin layers and allow each layer to dry completely before applying the next.
Another important tip is to use the right technique when sanding. Start with coarse sandpaper and work your way up to finer sandpaper to achieve a smooth surface. Be careful not to sand off too much material so as not to damage the levelling compound underneath. Use even pressure when sanding and move the sanding machine or sandpaper in a circular motion to achieve an even result.
Finally, it is advisable to be patient throughout the process. Filling requires time and care to achieve the best results. Take the time you need to carry out each stage of the process carefully. Thorough and patient work will pay off in the end and give you a flawless finish.
Avoid mistakes when levelling
There are some common mistakes that can occur when levelling, but these can easily be avoided. A typical mistake is applying the levelling compound to an unprepared surface. Make sure that the surface is thoroughly cleaned and free of old paint or wallpaper. Poor adhesion of the levelling compound can lead to cracks and flaking.
Another mistake is to use too much levelling compound at once. This can lead to the compound not drying properly and cracks appearing. Work in thin layers and allow each layer to dry completely before applying the next. This will ensure better adhesion and a smoother finish.
Finally, it is important to be careful when sanding. Many people tend to apply too much pressure or sand too aggressively, which can result in an uneven surface. Use light pressure when sanding and move evenly across the surface. By avoiding these mistakes, you can ensure that your levelling project is successful and produces a professional result.
The right preparation before levelling
Proper preparation is the key to a successful levelling project. Start by thoroughly cleaning the surface to be worked on. Remove dust, dirt, old paint and loose particles to create a solid base. Use a broom, hoover or even a damp cloth to make sure the surface is free of debris.
Then check the surface for cracks or holes that need to be repaired. Larger defects should first be treated with a suitable filler before applying the levelling compound. Make sure to press the filler well into the cracks to create a solid base. Allow this compound to dry completely before you start levelling.
You should also have the right tools ready before you start filling. Make sure you have different sizes of putty knife, sandpaper and possibly a putty machine to hand. Good organisation of tools and materials will help you to work efficiently and minimise the risk of mistakes.
Maintenance and care of the levelling tools
Maintaining and caring for your levelling tools is crucial to prolonging their life and achieving the best results. After each use, you should clean the tools thoroughly to remove any residue of the levelling compound. Use warm water and a brush to remove all residues. This will prevent the tools from rusting or becoming damaged.
Store your filling tools in a dry place to prevent moisture and mould growth. Appropriate storage can help to keep the edges of the spatulas and trowels sharp and in good condition. Avoid storing tools loose in a box as this can lead to scratches and dents.
If you notice that your tools are damaged, replace them in good time. Worn spatulas can prevent you from achieving the desired results. Invest in high quality tools that are durable and will help you with your projects. Taking good care of your levelling tools will be reflected in the quality of your work and help you achieve a perfect finish.
Conclusion: Achieve perfect results with the right levelling tools
To summarise, puttying is an essential part of any DIY project that requires a smooth and professional finish. Choosing the right levelling compound and tools is crucial to the success of your project. With thorough preparation, following proven techniques and avoiding common mistakes, you can achieve impressive results.
Remember that patience and care are of the utmost importance when levelling. Take the time you need to carefully carry out each stage of the process. Whether you're an experienced DIYer or a beginner, the right tools and techniques will help you take your projects to the next level.
By following the tips and tricks outlined in this article, you can ensure that your DIY projects not only look good, but also last a long time. A perfect finish is the key to a successful project and will help to increase the value of your home. Start levelling today and see for yourself the impressive results you can achieve!

- 25/12/2024
- 784 Views
_400x400.webp?ts=1735165250 "DE & BG Dicht GmbH")


