Step-by-step instructions: Install windows yourself like a pro!
Want to know how to install windows yourself like a pro? Then you've come to the right place! In this step-by-step guide, you'll learn everything you need to know to successfully realise your window project. Whether you're an experienced DIYer or a beginner, with our tips and tricks you'll be working like a pro in no time.
We'll show you which tools you need, how to take the right measurements, remove the old window and install the new one. We also give you helpful advice on sealing and insulation so that you can save energy and avoid draughts. Our guide will not only save you time and money, but also ensure that your self-installed window works perfectly and looks great.
So grab your tools and let's get started! Give your home a new look with a self-installed window and feel like a real pro!
The advantages of installing windows yourself
Installing windows yourself offers a number of advantages, not only in terms of budget, but also in terms of personal satisfaction and craftsmanship. One of the most obvious advantages is the cost savings. Professional window installers often charge high prices for their services, and many homeowners are surprised at how much they can save by doing it themselves. By taking on the installation yourself, you are only investing in the materials and tools, not including the additional labour costs. These savings can be reinvested in other projects or necessary renovations.
Another advantage is the flexibility and control over the entire process. When you install a window yourself, you have the freedom to make your own decisions, whether it's the choice of materials or the design of the installation. You can make sure that everything is done according to your ideas and standards. It also allows you to work at your own pace. You can take breaks whenever you want, without the pressure of a schedule set by an external installer.
Last but not least, DIY installation boosts self-confidence and manual dexterity. Many do-it-yourselfers report that they not only expand their skills through such projects, but also feel a sense of fulfilment when they see what they have achieved themselves. Knowing that you are capable of creating something of your own can be very motivating and help you to tackle similar projects in the future.
The necessary tools and materials
Before you start installing the window, it is important to compile a list of the tools and materials you will need. Basic tools include a tape measure, a spirit level, a pencil, a hammer, a drill and screwdrivers. These tools are essential for taking precise measurements, positioning the window correctly and fixing it securely. A cutter knife can also be useful for cutting gaskets or other materials.
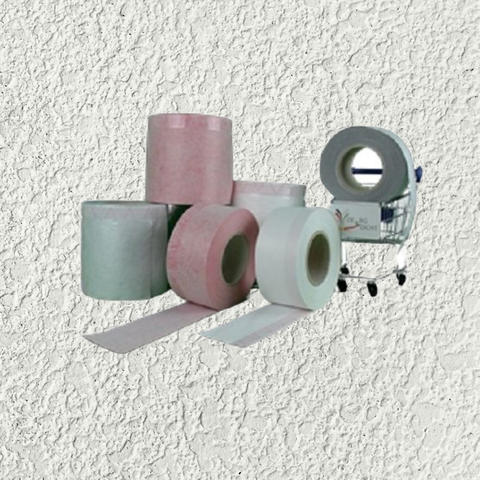
In addition to the tools, you will also need specific materials for the window installation. These include the new window itself, window seals, installation foam and possibly a vapour barrier. The installation foam is particularly important as it helps to insulate the window and prevent draughts. Make sure that the seals are of high quality to ensure a long-term seal. When deciding on a window, you should also make sure that it meets energy standards to minimise future heating costs.
It is advisable to obtain all the materials you need before the project begins to ensure a smooth workflow. This will prevent interruptions that can occur if you have to search for missing materials during installation. Good preparation is the key to a successful window installation, so take the time to put everything together carefully before you start work.
Step 1: Preparing the window installation
Preparation is a crucial step to ensure that the window installation goes smoothly. Start with a thorough inspection of the area where the new window is to be installed. Check the condition of the brickwork and ensure that there are no cracks or damage that need to be repaired before the new window is installed. If necessary, repair these defects to create a stable foundation for the new window.
Next, you should take the correct measurements for the new window. Measuring is one of the most important tasks, as inaccurate measurements can lead to problems during installation. Measure the width and height of the opening in several places to make sure you get the right measurements. Remember to measure the depth of the recess as well, as this is important for choosing the right window frame. Make a careful note of all the measurements so that you don't make any mistakes later when buying the window.
In addition to the physical preparation, it is also important to create a clear plan for the installation. Think about which steps you want to carry out and in what order, and make sure you have all the tools and materials to hand. A well-thought-out plan will help you work efficiently and minimise the risk of errors. Once you have made all the preparations, you are ready to move on to the next step.
Step 2: Removing the old window
Before you can install the new window, you must first remove the old window. Start by preparing the area around the window by removing furniture or other objects from the area to create a safe and undisturbed work area. Wear safety goggles and gloves to protect yourself from sharp edges and shards of glass during removal. Safety should always come first.
Once the work area is prepared, check how the old window is fixed. In most cases, windows are fixed to the frame with either screws or nails. Carefully remove the fixings with a screwdriver or hammer, depending on what was used. Be careful not to damage the window if you want to reuse or recycle it. If the window is in poor condition, be extra careful to avoid injury.
Once the fixings have been removed, you can carefully lift the old window out of the opening. It may be helpful to have a second person to assist you, especially if the window is large or heavy. Make sure to lift the window evenly to avoid breaking the glass. Once the window is removed, check the condition of the window frame and the surrounding wall to ensure that no further repairs are required before the new window is installed.
Step 3: Preparing the window frame
After the old window has been removed, it's time to prepare the window frame for the installation of the new window. Check the frame for damage or rot. If you find any signs of mould or decay, this area should be repaired or replaced to ensure the new window is stable and safe to install. Thoroughly clean the frame of dust, dirt and old sealants to ensure good adhesion of the new seals.
It is also important to check the dimensions of the window frame again to ensure that the new window will fit perfectly. Use a spirit level to ensure that the frame is straight and level. A crooked frame can result in the window not closing properly or problems with the seal. If you find that the frame is not level, you can use shims or wooden wedges to level it.
In addition to checking and cleaning the frame, you should also make sure that the sill and the top of the frame are in good condition. If these areas are damaged, it may be advisable to repair or replace them as well. A well-prepared foundation is crucial for the successful installation of the new window and will contribute to long-term energy efficiency and stability.
Step 4: Installing the new window
Installing the new window is the most exciting part of the project as you finally get to see the results of your preparations. Start by inserting the new window into the prepared opening. Make sure you insert the window evenly into the frame to ensure proper alignment. It may be helpful to have a second person to assist while you lift and position the window.
Use a spirit level to ensure the window is level both horizontally and vertically. This is crucial to ensure proper function and minimise the risk of leaks. If the window is not aligned correctly, you can use shims or wedges to bring it into the correct position. Make sure it sits evenly everywhere and there are no gaps to the frame.
Once the window is positioned correctly, you can fix it into the window frame with screws or nails. Start at one corner and work your way around the window to ensure it is evenly fixed. It is important not to overtighten the screws to avoid damaging the material. After fixing, check again with the spirit level that the window is still level before proceeding to the next step.
Step 5: Sealing and insulation
Once the new window is installed, sealing and insulating is the next and equally important step. This measure is crucial to prevent draught-free areas and heat loss. Start by thoroughly cleaning the area around the window to ensure there is no residue of old sealant or dirt. This will ensure better adhesion of the new seals.
Use high-quality sealant to seal the gaps between the window frame and the wall. Apply the sealant evenly and make sure that no gaps or cracks are left behind. You can also use foam gaskets to provide additional insulation, especially if you have larger gaps to close. Make sure you apply the seals evenly and neatly to achieve an attractive finish.
In addition to sealing, it is advisable to apply a vapour barrier to the inside edges of the window to prevent moisture from penetrating the walls. This measure helps to prevent mould growth and other moisture problems. After sealing and insulating, check that everything is properly in place and that no gaps are visible. A well-sealed window not only ensures a better energy balance, but also significantly extends the life of the window.
Step 6: Inspection and finishing
Once the window has been installed and sealed, it is important to carry out a thorough check. Start by opening and closing the window several times to make sure it works smoothly. Make sure it moves easily and sits correctly in the frame. Also check that the seals are tight and that there are no draughts coming in through the window. If you notice any difficulties opening or closing the window, check the alignment and fastenings again.
Once you have checked the functionality of the window, you can continue with the finishing work. This may include adding panelling or mouldings to enhance the transition between the window and the wall. Choose panelling that matches your interior style and make sure it is fitted neatly and evenly. An attractive finish helps to improve the overall appearance of the room and give the new window a professional look.
Finally, it is advisable to check the window and the surrounding area for any leaks or defects. Be sure to inspect all edges and joints and make sure everything is properly sealed. A thorough final inspection will ensure that you have achieved a high-quality result and that your project has been successfully completed. Now you can enjoy the result of your work and be proud of your self-installed window.
Important safety instructions for window installation
When installing windows, it is important not to neglect safety. Start with the right protective equipment. Wearing safety gloves and goggles is essential to protect yourself from sharp edges, broken glass and other potential hazards. Make sure you also wear sturdy footwear to ensure a secure footing, especially when working on ladders or scaffolding.
Another important aspect of safety is the correct handling of tools. Make sure that all tools are in good condition and work properly. Only use tools for their intended purpose and follow the operating instructions. When working with power tools, make sure that you switch off the power supply before coming into contact with the tool. This will help you avoid accidents and injuries.
Finally, it is important to keep the work area clean and tidy. Tidy up as you work to avoid tripping hazards. Remove broken glass and other debris immediately to prevent injury. If you are working with heavy materials or windows, make sure you always have a second person to assist you. Safety should be a top priority, especially for projects that involve height and heavy materials.
Conclusion and recommendations
To summarise, DIY window installation can be a rewarding experience that not only saves you money but also improves your craftsmanship. With the right preparation, the right tools and materials and a clear plan, you can successfully realise your window project. The steps we have gone through provide a comprehensive guide that is suitable for both beginners and experienced DIYers.
However, it is important that you keep safety in mind throughout the process. Make sure you take the right protective measures and work carefully at all times. If you feel unsure or if the project seems too complex, don't be afraid to seek professional help. It's better to play it safe and know the project is in good hands than to take risks.
When you have finally installed the new window and admire the result, you will be able to look back on your work with pride. Not only have you improved your home, but you've also gained valuable skills. Use this experience to tackle further projects and develop your craftsmanship. Good luck with your next DIY project!

- 28/12/2024
- 943 Views
_400x400.webp?ts=1735165250 "DE & BG Dicht GmbH")
Step-by-step instructions: Install windows yourself like a professional!


Related articles

Content: 0.75 Litres (€17.33* / 1 Litres)

Content: 0.75 Litres (€17.33* / 1 Litres)

Content: 6 m (€7.36* / 1 m)

Content: 0.4 Litres (€35.00* / 1 Litres)