Step-by-step instructions for the professional installation of a skirting board seal
When it comes to installing a skirting board seal, expertise and care are of the utmost importance. Incorrect installation can lead to serious problems such as moisture damage and mould. In this step-by-step guide, we will show you how to professionally install a skirting board seal.
The first step is to prepare the area thoroughly. Make sure the surface is clean, dry and free from dirt, grease and other contaminants. Remove any old waterproofing or damaged plaster.
Once the surface has been prepared, you can start with the actual sealing. Apply a suitable waterproofing compound and spread it evenly over the entire plinth area. Make sure that the sealant covers all cracks, joints and unevenness.
Once the waterproofing has been applied, allow it to dry and harden completely. Finally, check the quality of the waterproofing and make any necessary improvements.
With these step-by-step instructions, you are ideally equipped to carry out a professional installation of a skirting board seal and effectively avoid problems such as moisture damage. Follow the instructions carefully and enjoy the long-term benefits of correctly applied waterproofing.
What is a skirting board seal?
Plinth waterproofing is a special measure for waterproofing the transition zone between the ground and the masonry of a building. This waterproofing is crucial to prevent moisture from penetrating the building fabric. It not only protects the walls from water, but also helps to prevent mould growth and other harmful effects that can be caused by long-term dampness.
Plinth waterproofing is primarily used in areas that are in direct contact with the ground. These include, for example, the base of walls, basement walls or the joints between the foundation and masonry. The materials used are usually specialised waterproofing materials that are highly resistant to water and other weather influences.
In many cases, plinth waterproofing is also required by law in order to fulfil the requirements for building quality and protection against moisture. Professional installation is therefore not only recommended, but often necessary to prevent long-term damage to the building.
Why is professional installation important?
The professional installation of a plinth seal is essential to ensure the integrity and longevity of a building. Improper waterproofing can lead to significant problems, including moisture damage, mould growth, and ultimately a reduction in the quality of the home. This damage is often more serious and more expensive to repair than the initial cost of proper waterproofing.
Another important aspect is maintaining the value of the property. A well-sealed plinth area increases the lifespan of the building and can increase the value of the property. Potential buyers or tenants often keep an eye on the condition of the waterproofing, and visible defects can have a negative impact on their decision to buy. Professional workmanship offers security and confidence in the quality of the construction work.
Correct plinth waterproofing also protects against environmental influences. Wet walls can not only damage the building fabric, but also lead to the formation of pollutants that can jeopardise the health of the occupants. It is therefore essential to work carefully and precisely when installing plinth waterproofing in order to minimise all possible risks.
Preparation for installation
Thorough preparation is essential before the installation of the skirting board waterproofing can begin. Firstly, the area to be treated should be carefully inspected. It is important to identify any damage or weak points that need to be repaired before the waterproofing is applied. Cracks, holes or old, flaking waterproofing must be thoroughly cleaned or repaired to ensure optimum adhesion of the new waterproofing material.
Another step in the preparation is the removal of old sealants or plaster that are no longer functional. All residue should be carefully removed to create a smooth and clean surface. An uneven or dirty substrate can result in the waterproofing material not adhering properly, which can significantly impair the effectiveness of the waterproofing.
In addition, it is advisable to gather all the necessary materials and tools in advance. In addition to the sealing compound, this also includes tools such as a spatula, brushes, a spirit level and possibly a high-pressure cleaner. Good organisation makes the work process easier and ensures that no time is lost because materials or tools are missing.
Selecting the right materials and tools
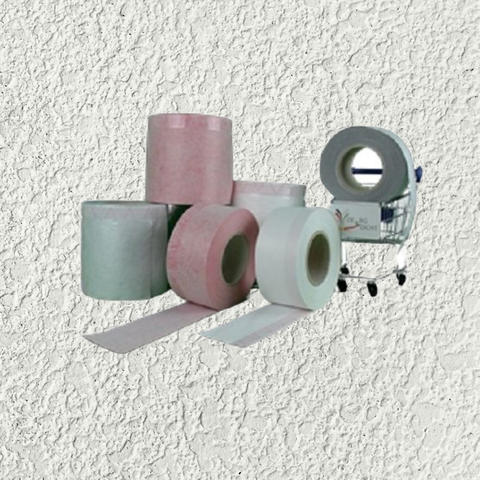
Choosing the right materials and tools is crucial to the success of the skirting waterproofing. There are different types of waterproofing materials that should be selected depending on the application. The most common materials include bitumen membranes, liquid plastics or special sealants that are highly flexible and resistant to water.
Bitumen membranes are particularly popular for their durability and ease of application. They offer a high level of protection against water and can be purchased in various widths and thicknesses. Liquid plastics, on the other hand, are ideal for irregular surfaces as they can be seamlessly adapted and seal all cracks and joints. It is important to consider the specific properties of the materials in order to make the best choice for the project in question.
In addition to the sealing materials, the tools are also important. A sturdy brush or roller is required to apply the waterproofing material evenly. Specialised spraying equipment may also be helpful for large areas. Personal protective equipment, such as gloves and respirators, should also be worn to protect against health risks that may arise from working with chemical substances.
Step 1: Cleaning and preparing the surface
The first step in the professional installation of a skirting board seal is to thoroughly clean the substrate. Firstly, all loose particles such as dust, dirt or old waterproofing residue should be removed. This can be done with a wire brush or a high-pressure cleaner. A clean substrate is important to ensure optimum adhesion of the waterproofing material and to avoid problems later on.
After thorough cleaning, the substrate should be checked for cracks or unevenness. Smaller cracks can be filled with a suitable repair compound, while larger damages may require professional plastering. It is important to carry out this preparatory work carefully, as it forms the basis for the entire waterproofing. If the substrate is not in optimum condition, this can significantly reduce the effectiveness of the waterproofing.
Once the substrate has been cleaned and prepared, it should be allowed to dry completely before proceeding to the next step. Moisture in the substrate can cause the waterproofing material to fail to adhere properly or peel off. It is therefore advisable to allow sufficient time for drying to ensure that everything is ready for the next phase of waterproofing.
Step 2: Applying the waterproofing material
Once the substrate is clean and dry, the waterproofing material can be applied. The type of material determines how it is applied. Bitumen membranes are usually supplied in rolls and must be glued to the prepared surface. Liquid plastics, on the other hand, can be applied with a brush or roller. It is important to follow the manufacturer's instructions to achieve the best results.
When applying the waterproofing material, care should be taken to ensure that it is evenly distributed. Unevenness or air bubbles can limit the effectiveness of the waterproofing. It is advisable to work in several layers, allowing each layer to dry thoroughly before applying the next. This ensures optimum sealing and increases the longevity of the material.
After applying the waterproofing material, it is important to carefully finish the edges and transitions. These areas are particularly susceptible to penetrating moisture and should therefore be sealed particularly well. Overlaps between sheets or transitions to other materials must be well anchored and sealed to ensure that there are no gaps that could allow water to penetrate.
Step 3: Installation of drainage elements
The installation of drainage elements is another important step to increase the effectiveness of the plinth waterproofing. Drainage systems help to drain water away from the waterproofing surface and prevent the build-up of water. This is particularly important in areas with a high groundwater table or in regions with frequent rainfall.
There are various systems that can be installed, such as drainage pipes or mats. These should be laid at a slight gradient to ensure effective drainage of the water. The space for the drainage should be planned in advance to ensure that there is enough room and that the pipes or mats can be installed correctly.
Once the drainage elements have been installed, the entire area should be checked again for leaks. It is advisable to carry out test runs to ensure that the water is drained efficiently and that no back-ups occur. A well-planned and professionally executed drainage system can significantly extend the service life of the plinth waterproofing and prevent damage caused by penetrating moisture.
Step 4: Finalising and checking the waterproofing
Once the plinth waterproofing has been successfully installed and the drainage elements have been fitted, it is time for the final work. Firstly, the entire surface should be inspected again to ensure that all areas are well sealed and that there are no gaps or defects. If necessary, remedial work must be carried out to ensure that the waterproofing is fully intact.
It is advisable to carry out a visual inspection after the waterproofing material has dried. Special tests can also be carried out to check the tightness. For example, a simple test could be to apply water to the edges of the waterproofing to see if it penetrates elsewhere.
Finally, all tools and materials should be properly cleaned and stowed away. Good organisation after the work is important to prolong the life of the tools and ensure safety in the work area. If all steps have been carried out carefully, nothing stands in the way of long-term protection against moisture and the associated damage.
Tips and tricks for successful installation
When installing a skirting board seal, there are a few tips and tricks that can make the process easier and improve the quality of the seal. One of the most important pieces of advice is to allow sufficient time for preparation and the individual work steps. Rushing can lead to mistakes that are difficult to rectify later.
Another helpful tip is to use high-quality materials. It is worth investing in tried and tested products that offer high durability and effectiveness. It is often better to spend a little more money to avoid long-term damage and subsequent costs.
It is also advisable to consider the weather conditions when planning the work. Ideally, installation should take place on dry, mild days to achieve the best results. Excessive moisture or low temperatures can prolong the drying time and impair the adhesion of the waterproofing material. Keep these factors in mind to maximise the chances of success of your waterproofing work.
Conclusion
To summarise, it can be said that the professional installation of a plinth seal is of crucial importance for protecting a building against moisture. Careful preparation, selection of the right materials and precise execution are essential to prevent long-term damage. The individual steps - from cleaning the substrate to applying the waterproofing material and installing drainage elements - should be carried out with care.
Following these step-by-step instructions not only helps to ensure the quality of the waterproofing, but also to minimise the risk of moisture damage. Ultimately, a well-executed plinth waterproofing will help to maintain the value of the property and improve the quality of life of the residents. By considering the tips and tricks, you will be able to carry out the waterproofing work effectively and successfully.
Investing in professional plinth waterproofing is worthwhile, both for the safety of the building fabric and for the well-being of the residents. It is therefore advisable to tackle the work conscientiously or, if in doubt, to call in a specialist.

- 27/12/2024
- 570 Views
_400x400.webp?ts=1735165250 "DE & BG Dicht GmbH")


