Do you want a flawless silicone joint in your home? Then you've come to the right place! In this step-by-step guide, we'll show you how to apply silicone with a gun and achieve professional results.
Silicone grouting is not only functional, but also contributes to the aesthetics of a room. To ensure that your joints look perfect, correct application is crucial. Our expert tips will help you to avoid unsightly marks or irregularities.
From preparation and correct application to post-treatment - we will guide you through the entire process. We pay attention to every detail to ensure that your silicone joints are flawless.
Whether you're an experienced DIYer or a novice in this field, this guide will take you step by step to success. Let's get started together and give your rooms a new shine!
Get ready for a step-by-step guide on how to apply silicone with a gun and achieve flawless results.
What is silicone and why is it used?
Silicone is a synthetic polymer consisting of silicon, oxygen, carbon and hydrogen. Due to its unique chemical structure, silicone offers excellent flexibility, temperature resistance and waterproofness. These properties make it an ideal sealing material for numerous applications, both indoors and outdoors. Silicone is often used in construction projects, plumbing and even in the automotive industry to ensure that joints are watertight and airtight.
The use of silicone is particularly beneficial in areas where movement or expansion may occur. For example, joints between tiles, bathtubs and washbasins are prone to cracking when materials expand due to temperature changes or movement. Silicone ensures that such joints remain flexible while providing a barrier against water and dirt. This not only contributes to the longevity of the construction, but also helps to prevent mould growth and other moisture problems.
Another reason why silicone is so popular is its ease of application. With the right technique and tools, such as a silicone gun, silicone can be applied effortlessly. It is available in different colours and consistencies so that it can be adapted to any environment. Whether for bathrooms, kitchens or window frames, silicone is the go-to solution for many sealing needs.
The advantages of using a silicone gun
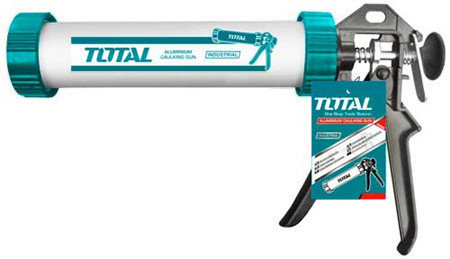
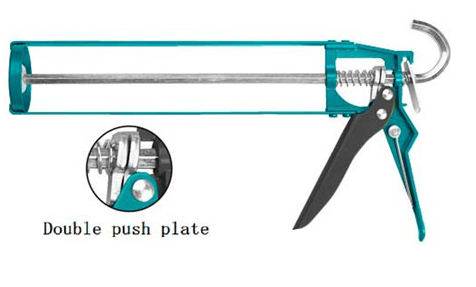
Using a silicone gun offers numerous advantages that make the process of applying silicone much easier. Firstly, a silicone gun enables an even and controlled release of the sealant. In contrast to manual application with a spatula or by hand, a gun allows you to precisely dose the amount of silicone, which leads to a cleaner result. This is particularly important when you are working on areas that are difficult to access or require a fine, precise line.
Another advantage is the ergonomics that a silicone gun offers. Most models are designed to fit comfortably in the hand and allow easy handling. This is particularly beneficial for longer projects where the application of silicone is required over an extended period of time. A good silicone gun reduces hand fatigue and ensures that you can achieve precise results even when working intensively.
In addition, many silicone guns offer various functions that further improve the application process. Some models have an automatic return mechanism that prevents silicone from escaping after the trigger is released. Others are equipped with different nozzles that allow you to adjust the width of the silicone line to your specific needs. This flexibility makes the silicone gun an indispensable tool for any DIY enthusiast or professional.
The right preparation before applying silicone
Before you start applying silicone, thorough preparation is essential to achieve optimum results. Firstly, you should thoroughly clean the area where you want to apply the silicone. Remove old sealant, dust, dirt and grease from the surface to ensure that the new silicone adheres well. To do this, use a spatula or a special silicone remover to remove old joints. A clean surface is the key to a long-lasting silicone joint.
Once the surface has been cleaned, make sure it is dry before applying the silicone. Moisture can affect the adhesion of the silicone and prevent the joint from curing properly. So wait until the surface is completely dry. It is also advisable to check the ambient temperature; silicone adheres best at temperatures between 5 and 40 degrees Celsius. Extreme temperatures can have a negative effect on the curing and quality of the sealant.
Another preparation step is to prepare the silicone gun and the silicone itself. Cut the tip of the silicone cartridge to the desired size to determine the width of the joint. Be careful not to cut off too much, as you will not be able to change the size later. Insert the cartridge into the gun and pull the trigger a few times to apply the silicone evenly to the tip. These small preparations can make a big difference to the quality of the end result.
Choosing the right type of silicone for your application
Choosing the right type of silicone is crucial to the success of your sealing work. There are different types of silicone, each developed for specific applications. Sanitary silicone, for example, is specially formulated to be used in humid environments such as bathrooms and kitchens. It often contains mould resistance agents that prevent the growth of mould and bacteria and thus ensure hygiene.
For outdoor applications, you should choose a weatherproof silicone that is UV-resistant and can withstand extreme temperatures. These silicones are usually elastic and can withstand mechanical stress, making them ideal for window, door and façade seals. Make sure that the silicone you choose is suitable for the substrate in question, whether wood, glass, metal or plastic.
For special applications, there are also types of silicone that are designed for use in the automotive industry or in industrial processes. These silicones offer special properties such as heat resistance or chemical resistance that are required for certain environments. It is important to check the specifications of the silicone and ensure that it meets the requirements of your specific application.
Step-by-step guide to applying silicone with a gun
To apply silicone with a gun, follow this step-by-step guide to ensure you achieve a perfect result. Start by preparing the silicone cartridge by cutting the tip at a 45-degree angle. Depending on the desired joint width, you can make the opening larger or smaller. Then insert the cartridge into the silicone gun and secure it properly.
Once the gun is ready, hold it at an angle of around 45 degrees to the surface to which you want to apply the silicone. Squeeze the trigger slowly and evenly while moving the gun along the joint. Make sure to apply even pressure to create an even silicone line. Begin at one end of the joint and work your way to the other end without stopping to avoid unsightly transitions.
After applying the silicone, it is important to smooth the joint to achieve a professional finish. To do this, use a special joint smoother or your finger, which you can dip in soapy water beforehand. Press gently on the silicone and pull it along the joint to create a smooth surface. Be careful not to apply too much pressure so as not to displace the silicone. Allow the joint to cure according to the manufacturer's instructions before using the area again.
Tips for a flawless result when applying silicone
To achieve flawless results when applying silicone, there are a few tips you should follow. Firstly, it is important to work with the correct technique. Hold the silicone gun at a constant angle and apply even pressure to the trigger. This helps to avoid irregular lines and lumps and ensures an even result.
Another important factor is the use of masking tape. If you want precise edges and don't want the silicone to spill onto neighbouring surfaces, you can apply masking tape along the edges of the joint. After applying the silicone, remove the masking tape immediately while the silicone is still wet. This prevents the silicone from fraying at the edges and ensures a clean edge.
You should also be careful not to apply too much silicone at once. It is better to work in several thin layers than to apply a thick layer that may not cure evenly. If you are not satisfied with the first attempt, you can easily scrape off the silicone after it has hardened and apply it again. Patience and care are the key to a flawless result.
Common mistakes when applying silicone and how to avoid them
There are some common mistakes that can be made when applying silicone and it is important to be aware of these to avoid them. One of the most common mistakes is not cleaning the surface properly before application. If old sealant, dust or grease is left behind, the new silicone will not be able to adhere properly, resulting in a weak joint. Make sure the surface is thoroughly cleaned and dry before starting the application.
Another common mistake is overworking the silicone. Many people tend to apply too much pressure to the gun, resulting in an uneven silicone line. This can easily be avoided by applying even and gentle pressure. Work in small sections and check the sealant regularly to ensure it is applied evenly.
Finally, waiting for it to cure is also a common source of problems. Many people tend to reuse the area too soon, before the silicone has fully cured. This can lead to cracks and leaks. It is important to note the curing time of the silicone chosen and leave the area untouched until the silicone is completely dry.
Cleaning and care of the silicone gun after use
Cleaning and caring for your silicone gun after use is crucial for its longevity and performance. Start by removing the silicone that is still in the cartridge, if possible. Squeeze out the gun and empty the rest of the silicone into a waste container. This prevents the silicone in the gun from hardening and blocking the mechanism.
Clean the nozzle of the silicone gun immediately after use with a damp cloth or paper towel to remove silicone residue. Avoid using sharp objects as these can damage the nozzle. If the silicone has already hardened, it may be more difficult to remove, so it is advisable to act immediately.
Store the silicone gun in a cool, dry place, away from direct sunlight. This helps to keep the gun's materials supple and ensures that it works perfectly for your next project. Regular maintenance and cleaning of your silicone gun will help to prolong its life and ensure that you are always ready to achieve excellent results.
Other applications for silicone and the use of silicone sealants
Silicone has numerous applications beyond simply sealing joints. It is often used in the construction industry to bond materials together and ensure a watertight seal. In addition to joints between tiles, silicone sealants are also used to seal windows, doors and other building elements to ensure energy efficiency and prevent water ingress.
Silicone is also used in the automotive industry, where it is used as a sealant for engines, windscreens and other components. These specialised silicones are formulated to withstand extreme temperatures and chemical influences, making their use in critical applications essential. Silicone is also used in electrical installations to protect cables and electrical connections from moisture.
In addition to traditional applications, there are also creative ways to use silicone. Artists and craftsmen use silicone for casting moulds, for making jewellery and even for making moulds in the food industry. The versatility of silicone makes it a valuable material for a variety of projects and applications.
Conclusion: Achieve perfect results with a silicone gun
To summarise, applying silicone with a gun is an effective method of achieving flawless joints. With the right preparation, choosing the right silicone and using tried and tested techniques, both DIY enthusiasts and professionals can achieve excellent results. Using a silicone gun not only offers precise control over silicone dispensing, but also ergonomic handling for longer projects.
Avoid common mistakes by cleaning the surface thoroughly, applying even pressure to the gun and respecting the curing times of the silicone. Remember to clean and maintain your silicone gun properly after use to ensure its longevity. The versatility of silicone and its many applications make it an indispensable material in every household.
With these step-by-step instructions and our expert tips, you'll be well equipped to create the perfect silicone joint. Whether in the bathroom, kitchen or other projects - with the right technique and the right materials, you can achieve results that are both functional and aesthetically pleasing. Get started and transform your rooms with professionally applied silicone!


_400x400.webp?ts=1735165250)


